Writing a clinical service with Opal
This tutorial will walk you through the creation of a new Opal service.
The application we're going to be building will help clinical users to manage the patients on a ward in a hospital.
As a Doctor
I want to know what's going on with the patients under my care
So that I can treat them effectively and safely.
Bootstrapping a new project
We assume that you've already Installed Opal. You can tell which version of opal is installed by running this command
$ opal --version
At the start a new project, Opal will bootstrap the initial project structure, including a Django project, some core datamodels (complete with JSON APIs) and a general application structure.
From the commandline:
$ opal startproject mynewapp
This will create a mynewapp directory where your new project lives.
Let's have a look at what that created for you:
mynewapp/                   # Your project directory
    LICENSE                 # A dummy LICENSE file
    Procfile                # A procfile ready for deployment to e.g. Heroku
    README.md
    manage.py               # Django's manage.py script
    requirements.txt        # Requirements file ready for your project

    data/                   # A dummy directory for fixtures
        lookuplists/        # A dummy directory for reference data

    mynewapp/               # The actual python package for your application
         __init__.py
        models.py           # Data models for your application
        settings.py         # Helpfully tweaked Django settings
        tests.py            # Dummy unittests
        urls.py             # Django Urlconf
        wsgi.py

        patient_lists.py    # these create the [lists](guides/list_views.md) for you application

        assets/             # Your static files directory
        templates/          # Your template directory
        migrations/         # Your Database migrations directory

        opal.sqlite         # The Sqlite development database
Test it out
The scaffolding step has generated you a working project - so let's check that out
cd mynewapp
python manage.py runserver
If you now visit http://localhost:8000 in your browser, you should see the standard login screen:
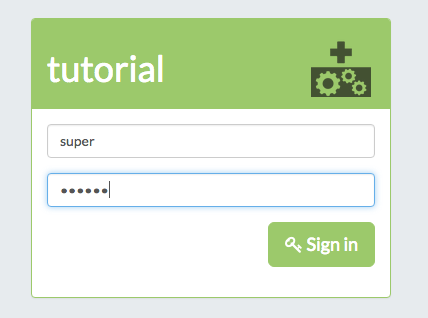
The scaffolding step created you a superuser, so try logging in with the credentials:
- Username: super
- Password: super1
When you log in you should be presented with a welcome screen that shows you the three areas that are enabled by default - team lists, search and the admin area.
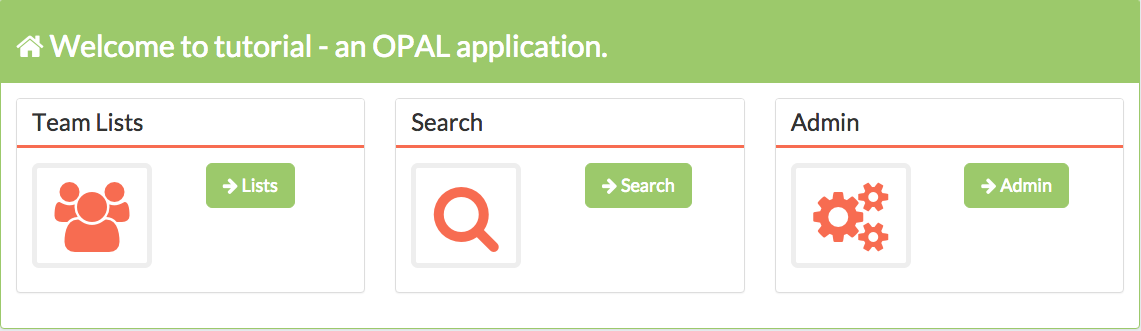
Opal applications are a collection of single page Angular apps that talk to the Django server-side layer via JSON APIs. The team lists and search options here are two examples of front-end Angular single page apps.
Team lists
Most clinical services will need at some stage to generate a list of patients - so Opal provides this functionality enabled by default.
The list view is a spreadsheet-style list of patients - try navigating
to the list view and adding a patient with the add patient button. episode

Each column contains a different type of information about a patient, while each row represents one patient.
Strictly speaking each row is an episode of care for a patient - but we'll come to that in a second.
The columns you see initially are just a few of the standard clinical models that come with Opal - for instance the Diagnosis model in your new application inherits from a model that looks a lot like this:
class Diagnosis(EpisodeSubrecord):
    condition         = ForeignKeyOrFreeText(Condition)
    provisional       = models.BooleanField(default=False)
    details           = models.CharField(max_length=255, blank=True)
    date_of_diagnosis = models.DateField(blank=True, null=True)

    class Meta:
        abstract = True
Reference data
You will notice that the condition field has a custom field type - ForeignKeyOrFreeText.
This is a custom field type that we use with Opal when we want to use a
Lookup List.
Lookup Lists allow us to reference canonical lists of available terminology as a foreign key, while also allowing synonymous terms, and a free text override. That means that we can ensure that we record high quality coded data, while allowing users an easy way to enter unusual edge cases.
Opal has a referencedata package which is installed by default for new applications.
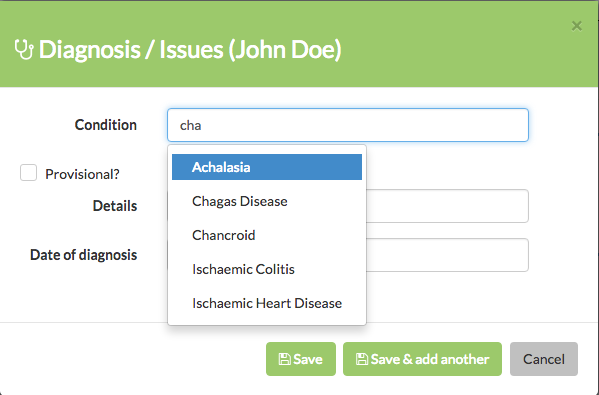
To see them in action, try adding a new diagnosis to your patient. As you start to type in the condition field, you'll see that the conditions we just imported appear as suggestions:
You can add your own Lookup Lists to your application.
For more details consult the Reference Data guide.
Add your own data models
So far we've begun to get a sense of the batteries-included parts of Opal, but before long, you're going to need to create models for your own needs.
Most Opal models are Subrecords - they relate to either a patient, or an episode (an episode is for example, an admission to hospital).
Let's see how that works by creating a TODO list model that is assigned to
episodes of care. In your mynewapp/models.py :
class TODOItem(models.EpisodeSubrecord):
    job       = fields.CharField(max_length=200)
    due_date  = fields.DateField(blank=True, null=True)
    details   = fields.TextField(blank=True, null=True)
    completed = fields.BooleanField(default=False)
This is simply a Django model, apart from the parent class models.EpisodeSubrecord
which provides us with some extra functionality:
- A relationship to an episode, linked to a patient
- JSON APIs for creating, retrieving and updating it
- Ensuring that the Opal Angular layer knows it exists
- Some metadata fields, like created, updated, created_by, updated_by
Next, we're going to let Opal take care of the boilerplate that we'll need to use this model in our application. From the commandline:
python manage.py scaffold mynewapp
Let's take a look at what that did:
- It created a Django migration
- It ran that migration for you
- It created a detail template
mynewapp/templates/records/todo_item.html - It created a form template
mynewapp/templates/forms/todo_item_forml.html
Detail template
The default detail template simply displays each field on a new line:
<span ng-show="item.job">[[ item.job ]] <br /></span>
<span ng-show="item.due_date">[[ item.due_date  | displayDate ]] <br /></span>
<span ng-show="item.details">[[ item.details ]] <br /></span>
<span ng-show="item.completed">[[ item.completed ]] <br /></span>
Form template
The default form template will display each field on a new line, with some basic appropriate form field types set. It uses the Opal form helpers templatetag library.
{% load forms %}
{% input  field="TODOItem.job"  %}
{% datepicker  field="TODOItem.due_date"  %}
{% textarea  field="TODOItem.details"  %}
{% checkbox  field="TODOItem.completed"  %}
Adding TODOs to our Team Lists
Now let's add our TODO list model as a column in the Spreadsheet-like list view.
Patient Lists in Opal are subclasses of opal.core.patient_lists.PatientList, and
they live in patient_lists.py files of our Django apps.
Technically these can live anywhere you like - although if you put them in other places you're responsible for making sure that they're imported at startup.
Opal guarantees to autodiscover lists in `app.patient_list` modules.
You can see the basic list that the Opal application scaffold created for you in
yournewapp/patient_lists.py.
class AllPatientsList(core.patient_lists.PatientList):
    display_name = 'All Patients'

    schema = [
        models.Demographics,
        models.Diagnosis,
        models.Treatment
    ]

    def get_queryset(self):
        return Episode.objects.all()
The columns for lists are set in the schema property of the PatientList class. To add
our TODO model to the list, just add the model to the schema:
    schema = [
        models.Demographics,
        models.Diagnosis,
        models.Treatment,
        models.TODOItem
    ]
Refresh the lists page in your browser, and you'll see your new column on the end - add a TODO item, noting how we automatically get appropriate form types like datepickers and checkboxes.
You can edit any entry in the list view by double clicking on it.
Tweaking the default scaffolding
The scaffolding templates are only really supposed to get you started - you'll often need to tweak the templates they generate with whatever logic makes sense for your application.
Set an Icon for your model
You'll notice that your new column is the only one without an icon - we set the icon by
adding the following property to your TODOItem class:
_icon = 'fa fa-th-list'
Some other batteries included
Let's take a look at some of the other core functionality that we now have out of the box:
Search
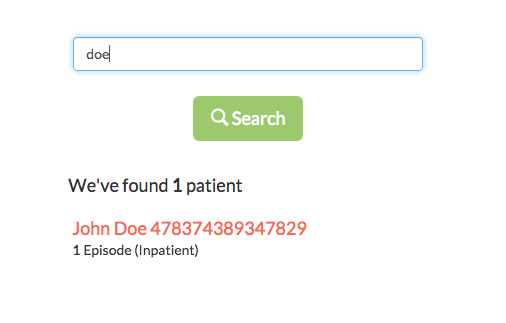
By default, we also enable the search module, which allows you to search by patient name or unique identifier:
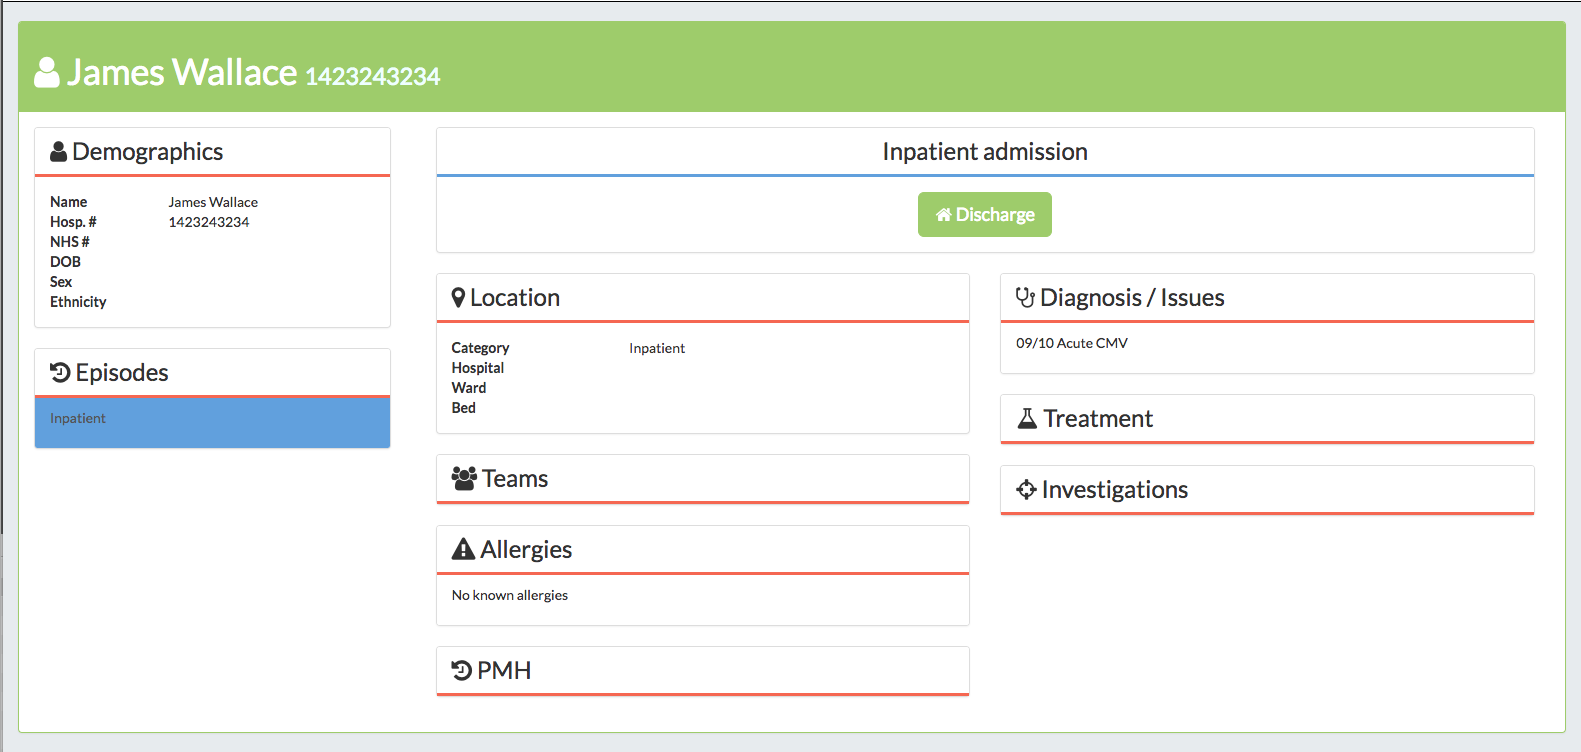
Detail views
We also have a detail view for our patients, which you can access via search results. This view will typically allow for a more detailed display and editing of all the events comprising a patient's care than is available on the list page.
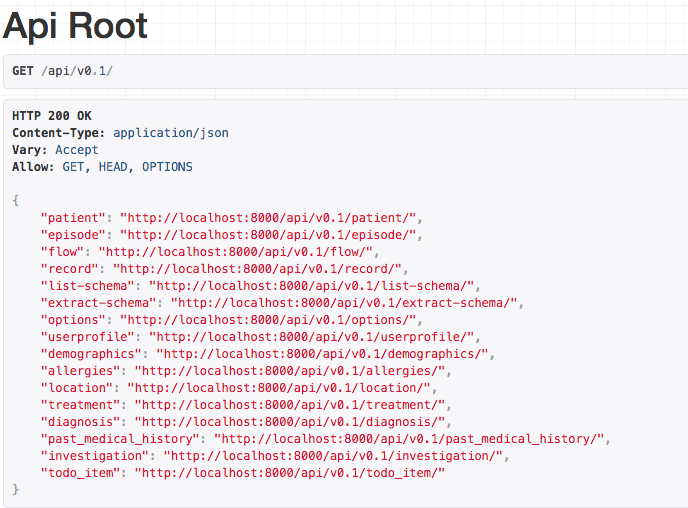
JSON APIs
Opal automatically creates self-documenting JSON APIs for your interacting with the data in your application. You can inspect these APIs interactively at the url:
http://localhost:8000/api/v0.1/
What next?
This is just a glimpse at the full range of functionality that comes with Opal - there is much more to discover in the Topic Guides.